Creating Cherished Memories and Capturing them Creatively.
Showing posts with label Freebies. Show all posts

Friday, December 4, 2009

2010 Brag Book Calendar Blog Train

I am back with more fun! And speaking of fun...have you been by the KjoiStudios forum to check out the Advent Calendar Hunt? Every day another part of this kit is hidden in the shop for you to snag for free...but if you want to know where it is hiding you have to check the member area of the forum.

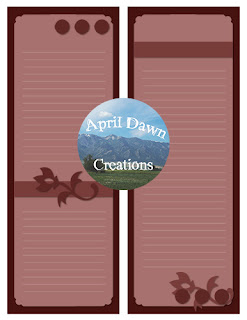
Now for some more freebie fun!! Some of the KjoiStudios designers have gotten together to help make your family calendars for 2010 a breeze! There are 10 designers that took on the 12 months...each designer with one of their items, which is now on sale for 50% off during the blog train for the calendar pages. So...here is my BB-sized Quick Page Calendar Freebie, for May 2010:

(Click on the image above to download directly.)


And here is the blog train list so that you can grab the rest of 2010 from their blogs:

Jan * Panda Bear Designs
Feb * ScrapznBitz
Mar * SandEz
Apr * Lizard Dau Designs
You are here!---->May * April Dawn Creations<----You are here! Jun * ScrapznBitz
Jul * KatLen Kreations
Aug * ice princess
Sep * Lori Imel
Oct * CACTUSmango Designs
Nov * Designs by Angel
Dec * KatLen Kreations

Monday, October 26, 2009

Breast Cancer Awareness-Charity Kit and Freebie!

Hi all, just popping in to let you know what I have been up to lately. Did you know that this month is Breast Cancer Awareness month? If not, now you do! It is amazing how many fabulous things I have seen going on this month to push forward this cause. I know this disease is one that hits families hard, and catching it early is key. So...the designers at KjoiStudios wanted to do their part in helping contribute to the awareness of this disease so more lives might be saved. And what do the designers do...but design! So 13 of us have put together this INCREDIBLE and gorgeous charity kit:

(Click on the image to visit it in the KjoiStudios Shop.)

All proceeds of this kit go to the Susan G. Komen Fund...the shop paypal fees are included too, so every cent goes to them! Here is the description in the shop for you to see what we put together for you:

This kit was put together by 13 designers who want to get out the word on Breast Cancer Awareness. ALL proceeds from the sale of this kit will go to the Susan G. Komen Fund to aid in this cause! For more information, or to donate to this cause directly visit: http://ww5.komen.org/. This kit is for all the mothers, daughters, sisters, aunts, cousins, friends, grandmothers, and many other loved ones who have ever suffered from this illness and their families.

It is so important to catch this early...and that is the message we want to get out! Check yourselves, be checked by your doctor, and be aware for those that care so deeply about you! To those that haven't survived this...we will remember you forever!! And to those that have survived this...we are amazed by the strength and courage you inspire in those that are around you...THANK YOU!

This kit includes 71 papers, 113 elements, and 2 alphas. All items are 300ppi resolution, and are jpg/png files. The papers are all 12x12 in size.

There is also a generous coupon added by Kara of KjoiStudios for her shop!

The elements include: 12 frames and frame clusters, 13 flowers (1 of which comes in 3 colors), 15 Word Art, 9 individual Breast Cancer Awareness ribbons, 5 bows, 8 ribbons, 5 tags and journaling tags, 4 butterflies, 4 buttons, 2 bottlecaps, 3 doodles, 3 glittered chipboard pieces, 3 borders, 2 crowns, 2 flourishes, 2 mats, 1 marquisite pin, 1 sparkly tree, 1 butterfly trail, 1 scatter of silver hearts, 1 frilly heart, 1 silver swirlie, 1 Breast Cancer Awareness t-shirt, 1 glitter leaf, 1 photo turn, 1 Hope rock, 1 chipboard piece, 1 rose stick pin, 1 eyelet ribbon, 1 Hope charm necklace, 1 lace clip, 1 ribbon pile, and more...

The alphas are: A distressed chipboard alpha (Uppercase only), and A glittered polka dot alpha (Uppercase, Lowercase, Numbers, and Punctuation).

Now this isn't all we have for you, if you like BB pages and freebies you are in luck! Lori Imel has taken this fabulous kit and put together an FABULOUS BB page album for us to post parts of on our blogs to help get the word out! You can get the part she donated for me to use by clicking on the preview image below:

(Click on the preview to download the BB pages Freebie!)

You are probably wondering where you can get the rest of this STUNNING album?! Well, no worries! All the information about what blogs to visit will be/or is posted on the KjoiStudios Blog! Just visit the blog for the list! And please help us in getting the word out, both about Breast Cancer Awareness, and our charity kit! THANK YOU!!

Saturday, June 6, 2009

Updates, and Birthdays!!

Wow, it is amazing how time flies! My poor neglected blog...oops!...anyway it isn't neglected now!! I have been busy playing with the construction again. Check out the TOU tab and the About Me tab...they are updated! I still need to add the general information on the About Me page...but it is started and ready for me to finish. I am hoping to finish up some of the other tabs this next week as time allows...we will see as the kids are on summer break.

And speaking of time flying, this hit me hard the other day as I realized how close my son's birthday was. They grow so quickly. The changes are subtle from day to day, but when you look over a period of years they are incredibly and drastic!

Here is a LO that I made around his birthday last year!

Do you find the same happens with your scrapbooking? Are you one that tends to redo old layouts because they just don't fit your style or scrapbooking knowledge anymore? If so, my opinion is that you should let it be. I am like you on this...it truly does bother me, but a good friend pointed out the other day that this is a journal of your knowledge and how you have learned and grown.

If you change this, you lose that record of you, and as scrappers we are the person most often left out of our scrapbooks. Let's see what we can do to leave a record for our children, grandchildren, and other family that might really treasure it. It is amazing how much they see in us that we just don't see in ourselves!

Now, back to my son's birthday...with his birthday, I am having a "My baby is turning 9!" sale!! There are 9 items in my shop at KjoiStudios.net, that are only $1...these items are at least 50% off or MUCH more!! Oh, and the Fighting Fire kit that I made for his birthday is FREE...but all of this is ONLY for today!! So, come grab these items if you are interested!!

Tuesday, March 31, 2009

April Fool's Day...LOL!

In the past this has been one of my least favorite days, but not this year!! There is SO MUCH going on this time to have FUN with, there is no way I am going to feel anything more than excitement at what I KNOW you all are going to LOVE!!

But first let me get a tiny bit of business out of the way...lol...that sounds so drab! This is FUN business!! Kjoi has a new collab and it is our biggest yet, Garden Paths Mega Collab is perfect for scrapbooking those photos of doing yard work, landscaping, gardening (flower or vegetable), or even just simply enjoying the beauty nature brings us this time of year! This kit has 98 papers...all 300ppi and 12x12 jpg files. It also has 167 elements...all 300ppi png files. Here is the preview of this fabulous kit:

(Click on the Preview to visit it in the Shop.)

The elements for this kit include: 35 various flowers, 18 frames and frame clusters, 17 bows, 10 ribbons, 7 tags, 6 borders, 6 word arts, 4 butterflies, 4 branches, 3 seed packets, 3 overlays, 3 flower cards, 3 fence elements, 3 wavy beads, 3 leaves, 2 bowflowers, 2 kitty garden clusters, 2 pairs of brackets, 2 shovels, 1 folded paper, 1 bunch of grapes, 1 set stitched shapes, 1 tap w/drip, 1 frog, 1 fly, 1 bush, 1 aphid bug, 1 spiders web w/spider, 1 fox statue on a rock, 1 pot of tulips, 1 journaling mat, 1 clip, 1 trowel, 1 cart/wheelbarrow, 1 clay pot, 1 pot cluster, 1 rock, 1 snail, 1 bee, 1 archway, 1 tomato, 1 pea pods, 1 turnips, 1 carrot, 1 sun, 1 tools cluster, 1 flower stem, 1 button, 1 polka dot tool belt w/ tools, and 1 paper vine.

Now what else have I got for you...LOL...just you wait and see!! KjoiStudios is holding it's first ever GREAT KJoi Egg Hunt April 1st-April 30th!! One product from one designer will be on MEGA special for $1 every day during the month of April...we are talking greater than 50% off, some as much as 80% off!! But which designer, and which product, on which day??

Well, for that you must register in the Kjoi forum and visit it to find out! We will post one Egg with a clue each day. Find the Matching Egg in the Shop, and you will have your special for the day! There will be a crossword to fill out for those looking for more fun and a fabulous freebie to those who fill it out. For more details visit us in the KjoiStudios Forum to find out!! Here is the ad we put together...

(Click on the ad to visit our forum!)

I have a freebie, it was posted on the DigiScrapStation blog several months ago but not many were visiting there then, so I have chosen to dust off this fabulous Add-On to my Rosebud Garden Kit as it holds some of my favorite parts! Here is the preview:

(Click on it to download from the shop.)

I hope to see you around more often...oh, and no worries, this blog is still under construction...so if you click on my links above and find a blank page that is why!

Monday, March 2, 2009

Crazy Days

Where did I go?? Well, things have been crazy...lol, and it is long past due for an update! I was hired on as Media Manager and Site Admin at KjoiStudios. Learning my new role there has kept me hopping! But I have enjoyed every minute of it!

On top of this, there is a chance that my boys both have an autism spectrum disorder...at this point we think Aspergers. So, I have been busy trying to work with Dr.'s and the school and my boys to see what accurate diagnosis we might find. This of course is a job and a half, but I am finding a ton of support from friends...online and offline...who know what I am facing and are showing they care.

I have now officially left DigiScrapStation...although I hope to go back again at some point. With the above mentioned things going on I haven't had time to do anything more there, and didn't feel that right for Nancy who is so kind and easy-going. Anyway, I will miss them greatly but will still stop by from time to time as life allows because the ladies there ROCK!! They are so nice and welcoming!

Then, at KjoiStudios...we are preparing to celebrate International Scrapbooking Industry Day on March 4th. There is SO MUCH going on there! We have at least 6 different challenges, 3 chats, 2 games, and 2 drawings...all of these come with a prize for the winner, or for the participants!! We were able to line up some incredible sponsors for the prizes too!! Plus we will be hosting a hunt...don't worry there isn't a piece to this hunt kit that is hosted on 4shared or any other file sharing site...so no need to worry that freebie hunting is going to destroy your computer! So, I hope to see you all there! And I look forward to hearing what you all have been up to...lol!!

Monday, October 27, 2008

Okay...Week #2 is here!!

Hi all,
I am having so much fun with this new challenge! Not to mention making the digital freebies to go with it! Here is a preview of Week #2's freebie. You will find it in the 10 Weeks Before Christmas Challenge at KjoiStudios!

This weeks challenge is about making those dreaded gift lists...and making it FUN to check them twice!! Here's an idea...how about scrapbooking them!! More on this in the Challenge forum!! Come share fun family gifting traditions with us!!

Thursday, October 16, 2008

Joi De Vivre-Kjoi Blog Hop!!

Okay, so you made it to my blog!! YAY! Here is a little about me...

I am a 29 yr. old, SAHM of 4 young children, and I am married to my best friend and biggest supporter. I have been traditional scrapbooking for nearly 12 years...some years more so than others. I have been playing with digital scrapbooking for about 2 1/2 years, but have REALLY found it beginning of this year...thanks to Jessica Sprague and my great friend Janei (who introduced me both to digi and to Jessica). I have wanted to get into the designing aspect ever since I started playing with digi!! I LOVE creating things...music, a smile on someone's face, almost any craft, more projects for myself...LOL! Creating things is what makes my heart sing with joy...that is ME!!

Now...enough about me, here is what I created for the contest:


And here are the various Avatars that I used:

...can you tell I LOVE Unicorns??:

And finally, last...but most definitely NOT least!!...what you all have been waiting for...My Blog Hop Freebie:

Click on the preview to download

Monday, October 13, 2008

Calendar Tutorials as promised...with freebie.

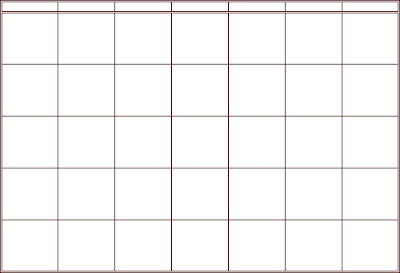
There are two routes that you can use to make a calendar grid in PS. You can make one using Microsoft Excel, save it as a pdf file with a PDF Writer like Ghostscript, and then open it with PS and use it as you need. Or you can simply use your line tool in PS to make a grid and use that as you need for your calendar. For example purposes I am leaving off a spot in the grid for the month...I figure that can be added creatively later!! Here is the tutorial for making it in Microsoft Excel first(scroll down for version 2):

I was able to use PDF Writer (Ghostscript) to convert my Excel file into a pdf. PSE and CS are both able to open and manipulate pdf files. I find this software through my print screen when I go to print. I will have to check with my DH to see how we got this software on our computer, but I am pretty sure that it was a free download. Anyway, when you go to File>Print then a screen comes up that gives you an option of choosing where to print to. I select PDF Writer (Ghostscript) in place of my printer and it prints it to a pdf file on my desktop...you are able to save it somewhere else when you save it. This is probably the EASIEST way to convert it to workable in PSE or CS. It does print it a brown shade, but that is easy to fix in PS.


For the example grid above, I highlighted 7 cells across by 6 cells down. Then I right clicked and selected format cells. Next put a border around the cells. I left a blank borderless row of cells on the top so there would be room for the name of the Month. Depending on what you want to do with the days of the week you may not need 6 bordered cells down, just 5 will do, but be sure to leave room for you to add them if you want to.

Here is how I set up my example: The first row of cells(blank for the month) I put at a row height of 40. The next row (first bordered-for the days of the week) I put at the typical row height of 12.75...you may want to play with that depending on fonts. The last 5 rows (for the calendar body itself) I put at a row height of 66. Then all 7 of the columns are at a column width of 12.

I did add a little more decorative border around the days of the week row and the whole outside...but you can play with the borders as you like in your own. Also, If you like mine enough...you can go ahead and use it. Just right click and select Open with Adobe Photoshop....etc. Hope this helps you. Let me know if you have any other questions.


And now for version 2...how to make a grid in PS (whichever version you have):

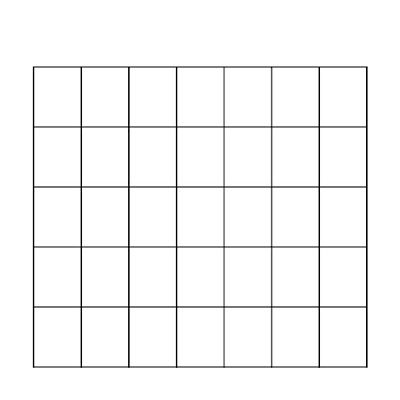
My example this time is a 12x12 one, open a new 12x12 file, white background, and 300ppi. Next click on your line tool to make sure that is the tool you are using. Next, if you don't have the grid showing, go to View and click on Grid so that a checkmark shows up next to it. While you are in there make sure that Rulers also has a checkmark next to it.

Now for the example above this is what I did...


In the top option bar for the line tool click on the weight box and type in a weight of 10 px. (This sets how wide your line will be.) Now click on the calendar screen to set it and it will give you a plus sign in place of an arrow. Place the plus sign at 1" on the top ruler and 2" on the side ruler using the grid to line it up. Click and Drag while pressing Shift until the "plus" sign lines up with the 11" mark on the top ruler and then let go. This will give you your top line. Now do the exact same thing only move down to the 11" mark on the side ruler, again click-shift and drag it from the 1" mark to the 11" mark on the top ruler. This gives you your bottom line.

Most calendars have at the most a need for 5 rows down for the body of the calendar...with just a few exceptions (that is when they add a slash through the the bottom rows first one or two "boxes"), but you can decide if you prefer another row or to slash them. For my example I am just sticking with the 5 rows and no slashes as this will be fine for majority of the time.

So, the next step is to right click on either the top line layer or the bottom line layer and duplicate layer...do this over again until you have duplicated it 4 times. This will give you a total of 6 lines. Click on the move tool, and uncheck Auto Select Layer. (Make sure to recheck this when you are done.) Now move the 4 duplicate line layers so that they are space out...IT DOESN'T HAVE TO BE PERFECTLY SPACED!!...just make sure that they are between the top and bottom lines.
Now click on the top of the line layers in the stack to highlight it in the layer palette, then hold down shift and click on the bottom of the line layers in the stack. This will highlight all of your line layers. While still on the move tool, go Distribute on the top tool option bar. Click on Vertical Centers. This is really COOL!! It will perfectly space your lines for you!!

Now, while they are all still highlighted, is the time that if your lines got a little out of line...LOL!...then you can line them up. Go to Align, and Horizontal Centers. You should find that you now have all of the horizontal lines you need for your calendar, and they are spaced just right. The next steps are easy, you basically are doing the same thing only dragging from top to bottom instead of from left to right. And you will need more duplicate line layers as there are 7 days in a week, meaning you need 7 columns. So, here goes...Go back to the line tool and place the "plus" sign back on 2" on the side ruler and 1" on the top ruler. Click-Shift, and Drag it down to 11" on the side ruler and then let go. Again, using your grid helps. Now you have your left grid line and your grid is starting to look more like a box or grid then just a bunch of lines. Place your your plus sign at 11" on the top ruler, and 2" on the side ruler. Do the same thing: Click-Shift, and Drag your line down to the 11" mark on the side ruler. This gives you your right grid line. You are ready for Duplication. This time you want 6 Duplicate line layers. Space them apart, again NOT PERFECTLY. Click the move tool, Distribute, and this time you want Horizontal Centers. Again, while highlighted still, if needed you can go to Align and this time pick Vertical Centers.


You should now see a very nicely spaced grid. However, if you are picky like me, you might be looking at the corners of your grid and saying...WHY AREN"T THEY MATCHED UP??? Well, not to fear...mine didn't either. So, now for the final touches.


You should still be on the move tool...if not, click on it. Now I want you to simplify/rasterize all of the vertical line layers (if you are like me...LOL!...that means the ones from top to bottom!). Highlight all of the simplified/rasterized layers in your layer palette and watch for the transform box. Then I made the lines much longer by using the "mini" boxes on the top and bottom in the center. (Let me know if I lost you there!) This doesn't change the width of your lines so it still looks fine.


The final step is to take your Rectangular Marque tool and select a rectangular area around the extra pieces of vertical line on the top of the grid, click on each of the vertical line layers in turn and hit the delete button on your keyboard. Now do the same thing only select a rectangular area around the extra on the bottom of the grid.


This should make it so that when you are done your grid now looks like a box with smaller boxes inside...or a GRID! Now pat yourself on the back...you have a calendar grid perfect for making your family calendars!!


I didn't leave much room for Decorating, just for adding Month and Days, in my example. But you can easily resize your grid to a smaller size for you to have embellishing room. One other option for making it a bit more decorative is to do the same thing as described above, only with the brush tool. If you like the dashed or dotted line look this might work better for you. Just be sure to hold shift so your lines are straight, skip the simplify/rasterize steps, and create a new layer everytime you draw a new line. That will make it easier to play later with matched up corners and edges. Hope this helps you! If you have any questions or I just simply lost you let me know and I will do my best to answer the questions and reword the step I lost you on.

Now for the FREEBIE!!!! I went and made some calendar grid brushes...both landscape and portrait directions for an 8.5x11, and then my 12x12. You can get them by clicking here. Enjoy!!


Friday, October 10, 2008

New Class with Jessica Sprague!!

I am so very excited about Jessica's announcement today, that she will be doing one more class this year. It is called Stories in Hand and is all about capturing your stories...whether you have pictures for the story or not!! This is a FREE class good for the scrapper and the non-scrapper alike, great for beginners and very advanced learners in scrapping as well!! Check out the flyer she made up for this!!

Click on the image to be taken to her FABULOUS site!! She is all about helping others learn how to capture their stories...whether in the scrapbook page, on the page of a journal, or now it sounds like even on our blogs!! YAY!! THANKS JESS!!

If you have never taken one of Jessica's classes this is a great time to find out exactly why she has made so many friends in the scrapping world with her classes and her site!! This is a great way to find out if the way she teaches her classes will work for you!! And Heather P., email me if you want to do this...I am taking it too!!

Thursday, October 2, 2008

Freebie Template and Tutorial...

...but it isn't the calendar one yet! Yesterday I got to playing with a template design after I saw a video on making a Journaling Card Page from traditional supplies at ScrapSupplies.com. They have a few different videos, so feel free to check them out. Now I thought to myself, I wonder if I can create something similar in digi...and so I had a LOT of FUN doing it!! Here is what I came up with...

This peaked my interest as I just finished the Type+Write Class at JessicaSprague.com that focuses on fun ways to add truly meaningful journaling to you LO's. IT WAS FANTASTIC!!! And Jess had put together some INCREDIBLE templates for us to use, that also had me wondering...can I figure out how to do THAT too??!! So, there are some added fun layers to this template that you won't need to touch...unless you don't like what I did with it. It still isn't quite up to Jessica's caliber...but it is getting closer!

Now in the cool tutorial video they took tags and made them into flaps that they could put photos under. I have included a template without a shadow behind the cards for this purpose, this is what you will use. Anyway, here is a little tutorial for you on how to do something similar:

Go ahead and clip on your papers like you would with any other template...if by chance you don't yet know how to do this with PSE or CS, not to worry, check out a FABULOUS video tutorial by Jess done for CKM at The Spraground Free Tutorial Area . You might need to be logged in to see it. It comes with a Freebie too!

Take your page once everything is added and it has been printed, and grab a cutting tool...I will be using an exacto knife.

( I hope I don't lose anyone by adding this here, but if you want the BACK of your tags to have a color or patterned paper on them when they are open you will need to adhere the paper of your choice to the back of your printed layout BEFORE you cut!}

Next cut along the edges of the "cards"...BUT BE SURE TO LEAVE ONE SIDE ATTACHED. You have flexibility here, you don't have to choose to leave the top attached on all of them, but you can go that route if it is your preference.

Use something to score along that remaining side, this makes it easier to fold. If you don't have any traditional scrapping supplies to do this you can use a pair of scissors. Open them and VERY GENTLY run the blade along where you want to fold. (If this isn't done carefully then you will cut through it...so again BE GENTLE if you go this route.)

After you have done this to any of the 11you want photos under, than you want to have a way to put the photos underneath your card "flaps", but not to fear there are a few ways to do this:

1. I have created a template...simple though it be...for that too, just adhere it under your journaling card layout.

2. Just glue/adhere them under after you have made the flaps.

3. Take a piece of 12X12 cardstock and adhere them to that then attach the two.

You should then have a completed page with both Journaling and Photos. The project that I took the inspiration for this from used this as a month page...so there is one thought for you. I look forward to seeing what you come up with. If you remember too...I know I forget things often...please post back here with a link to your finished layout! I only created the templates yesterday, so I have not yet had time to do an example for you...but I will be posting it here when I have it finished.

You can download the zip of the templates by clicking on the preview here:

(This will only be a freebie on my blog for one week...then it will be able to be found in my store at Digiscrapstation.com .)

Tuesday, September 30, 2008

Sale Time!! Just because I LOVE you!!

Okay I put all of my previously displayed items at DSS on sale 50% off yesterday for 2 weeks! I figure it has been quite a while since I had a sale, and I am feeling in a generous mood...so sale time it is!

Also, I have a new item offered in my store! LO services are now offered through the store. I am REALLY looking forward to offering this! You can find it in my store by clicking on the preview image.

I have a LOT of fun doing LO's and this gives me an opportunity to mix my designing with my scrapping! If there is a desire to increase this aspect to card services...especially with Christmas around the corner...then email me at aprildawn@digiscrapstation.com and I can see about adding a card service as well!

And for more good news...Kjoistudios.com has their store back up on a newer LARGER server, so the Design contest is back in full swing. There are 4 weeks worth of freebies up, and voting can be done on their forum for week 3 and week 4 through October 5th! Don't forget to comment on your favorites in their gallery either as those count toward their scores!

And for those of you from the Spraground waiting for the calendar tutorial...stay close by as that is on my plate for the next day or two. (Depending on what my children will allow me to do while on their school break! LOL!)

Friday, August 29, 2008

Wow...thought you were done?? Here is week 3!!


Simply amazing!! Now I could post more info here...but I REALLY need to go work on my week 4 entry!! So, go download(at www.kjoistudios.net/blog)-comment, and vote (the gallery and forum at www.kjoistudios.com !! Then make LO's...just because it is FUN!!

Thursday, August 28, 2008

Kjoi Studios Week 2 Designer entries are up!!

This is the color scheme and theme that all of us designers created from! And I do have to say that there are some FANTASTIC FREEBIES over at Kjoi. Now due to us overpowering her site...she has them posted and the downloads linked all on the new Kjoi Blog!! Check it out at: www.kjoistudios.net/blog and then be sure to swing by the forum to vote for your top 4 favorite entries!! Good luck narrowing it down to 4 out of the 34 contestants...because these entries truly are "knock your socks off" STUNNING!! Don't forget to comment in the gallery on your favorites either as comments, anc downloads count towards our overall weekly scores!

Here is the blinkie showing all of them:

And NO...I won't tell you which one is mine...weeeellll...not yet anyway! LOL!!

Wednesday, August 13, 2008

Kjoi Studios Designer Contest Week 1 Freebies!!

They are up...go check them all out! This is going to be one TOUGH competition as they have all turned out FABULOUS!! There are around 40 Freebies for the capture...but PLEASE stick around and Vote on your top four favorites!! Downloads and Comments are also counted for the contestants (like me!!) so be sure to comment on your favorite ones!! I would post examples...but then that might give mine away, or narrow it down for the guessers! So...just know this-the theme for this weeks entries was Vintage, Heritage, and Grunge! And the color scheme was this:


Someone put together a blinkie of all the entries in the contest...so we were given approval to put it on our blogs!! So, here they ALL are...

Go snag them at KjoiStudios.com ...then be sure and comment and vote for your FAVORITES (up to 4 of them!!).

Friday, June 20, 2008

Been a little bit...but I am back with more goodies!

Hi all, I have so much going on lately so I have been a little too silent here...but it is time for an update! There is so much that I don't know quite where to start. I guess with the new guest designer position!

That's right I am a guest designer for the month of July at Benevolent Boutique. This is a non-profit store, devoted to serving others. June's Charity has been the Make A Wish Foundation. So, all proceeds from the June items sold go there, and there is even a place to simply donate if you would like to. I am truly thrilled about this as it is a store that fits me, just wish I could do this always...I might have to work on that. There are so many that need help out there, I am always wishing I could do more. But it feels absolutely fabulous to be able to share my time and talents to help.

Now for the latest on my store in DigiScrapStation...I have a new kit up, and I think it is my best yet! Rosebud Garden...it comes as a kit, or can be bought as a paper pack, an element pack, or an alpha.

DigiScrapStation just started up a store blog this week, and it is looking fabulous! You can check it out here. And be sure that you do...because I felt that it had been far to long without a freebie for my friends! So, Friday's Freebie is from me, and goes fabulously with my new Rosebud Garden Kit!! Check this out:


I am so thrilled! I truly hope that you enjoy this! You can find it on the store blog, just click on the awesome train download button at the bottom of my post there and this beauty is yours!!

Wednesday, May 14, 2008

Secret Revealed!! YAY!!

Okay, time for the secret reveal! I was asked by Nancy Wilkins of DigiScrapStation.com to join their design team!! YAY! I have been very busy getting myself familiar with the new information on how to set up my store. I don't have much in it, but plan on spending a LOT of time on designing in the next few weeks to get more in there...so please stop in to see from time to time all the new things I will be adding.

I want to stop here and thank all of my friends both on the Spraground and here that have been so supportive in my designing and playing...I couldn't be at this point without all of you and a VERY supportive family. And THANK YOU JESSICA!! I didn't move on in the SYTYCD challenge at Scrap Orchard, but this is SO much better!

Now for the real FUN! DigiScrapStation is having it's grand opening starting Tomorrow until Sunday!! May 15th is National Chocolate Chip Day, and we have been busy making the most of this! We have put together a kit, but in order to get all the pieces you must visit places on our site...so stop by the forum and see the Welcome Gifts area for more info on this! But here is a sneak preview of what my part is:

Chocolate Chip Kit Preview

We are going to be making you hungry with this kit...so you might want to either buy or make some cookies and have a glass of milk on hand to help with this! Have a LOT of fun...there are some great sales going on as well, so shop if you like! There might be other freebies during the next week too!

Like I said, I don't have much up in my area yet, but in the next few days I am hoping to add a few things...so be patient with me and enjoy the other designers in the meantime! I am so EXCITED!!

Friday, April 18, 2008

DID class and Templates!!

This was the LO that started the ride. I copied Jessica completely, except for the title, journaling, and of course, my own pictures. These were taken a few years back when I was playing with taking more professional looking photos from home.

Credits: This was done using course materials from Jessica Spragues DID class, some were donated by designers at DesignerDigital. The Fonts are One Fell Swoop and Texas Hero, both can be found at dafont.com.

Our second assignment for the first week was to take what we had learned and put it to use in a second LO. About this time my kids decided that the computer was taking up too much of Mommy and that they were going to get my attention (or that is how I took it)!! And to remember the lesson, I turned it into a LO!


Credits: I made the spice paper from a photo I took of the mess, and the brown "vellum" journaling block. I used an overlay from Trish Jones for the grungy edges, and the other 2 papers-background and strip, are from a Grateful4U Kit that was given as CT Appreciation Week.

This was Week 2's LO!! WOW!! We learned how to make our own patterned papers, our own brushes, customize stitching, and a whole slue of other completely amazing things!! Have I said how VERY HIGHLY I recommend HER classes?? If not...HINT HINT HINT!! LOL! I came across these photos, searching for Then and Now photos, and have decided I need to make this a traditional LO for all of my kids when they are turning 8!!
Credits: Materials from Jessica Sprague's DID class, some made during class, and some from designers at DesignerDigitals.


OK, now has it been fabulous so far or what!! Now, on top of that we were challenged during one of the midweek activities to design some templates using some smaller ones she had designed as a jump off point! I have 3 that I have made so far jumping off from hers, and one that is completely me (except for one shape I lifted off of an item in Natalie Bird's Kit I used for my LO that I made the template from). I am SO excited to share these with you, so here they are:


This last one has a LO it was designed from I was so excited with how it turned out that I had to share!! This is of my oldest when he was only 8 days old!!

Credits: I did this using the Little Boy Blue Kit from Natalie Bird Designs! The title font is Night Sky, which I found through google. I had so much fun with this!!

If you like the templates you have seen...then you will love knowing that I am going to share them with all of you!! You can download them here.

Monday, March 24, 2008

Freebie, and Tag Update!

The lucky friends who have now been tagged are Veevs, Stacey(99), Heather(P.), and Jaime. (Two from the Spraground and two from everyday life that are very dear to me.) Ladies...scroll to the next post for the rules. To make it up to you Ladies, for those graduating from the newest class of U&R this week, and just for fun here is a template freebie that I put together(anyone can enjoy):


I do have to credit my mentor-Jessica Sprague for the idea behind this template with her Photoshop Friday (PSF) on Designing a Layout with Rings which can be found on her blog.

I hope all that wanted it got it...now it has been moved. This was quite fun to put together, and I will be using it for a template challenge starting next Tuesday at the DesignsBySassy challenge forum. Feel free to go over and check out the other challenges going on there as well...I have a Theme challenge going on right now based on the phrase-"You are a part of Me". I haven't yet done my LO for this challenge, but I do have a picture in my head and it will involve my 90 (almost 91) year old grandmother. You can find the challenge thread (this was disabled sorry!).
I am working on a LO with my template as I type (multi-tasking) and will post it here when I finish.


Credits: Bkgrnd Paper and RibbonPapers-From Grateful4U Kit for CT members:Designers Tangie and Melissa Daniels Consecutively. PolkaDot Paper and Pink Mats-are from KPertiet ScrapPink Kit. Purple Star Paper-is from TaDaDesigns LDD Apprentice Submission and can be found on their blog. Jeweled Circle-is also from the Grateful4U Kit for CT members: Designer Beckie Kress. Flourish around accent photos-JessicaSprague U&R Week 4 Course Materials(You must take her class to get this flourish as far as I know. And the Vellum Circle I made. The fonts are: MASexy and the date is Century Gothic.

I thought it only fitting to do this LO about my little Analise. I came up with the idea for this while unintentionally napping on her bed! She was supposed to be the one napping...but wore me out instead! LOL! It felt good to get a nap in after...well...way to long without one! Thank goodness that Daddy was home to watch the other 3!

Thursday, March 6, 2008

First Ever Kit...Watermelon Patch!

Well, here goes! This being my first attempt, I thought it best to be a freebie shared with all of my friends and family that like to visit here! This is what the kit looks like:I am still figuring out uploading to share it so, now that I have teased you...please be patient as I get it uploaded and ready for you! Oh, wait...I got it figured out you can download this freebie here...please leave me a link in the comments if you use my kit on one of your LO's, I would love to see them!

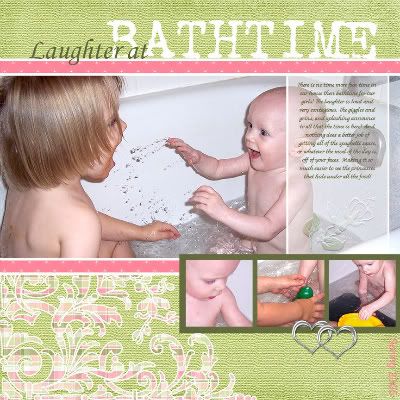
Here is my layout with my kit for week 3 of my U&R class with Jessica:

Laughter at...

Credits: KPertiet (altered background paper to use her flourish with my plaid paper, and altered her ribbon to use my bright pink sparkle paper), All of the rest is from the Watermelon Patch kit.

EDIT: CLICK ON THE WORD "HERE" next to the word freebie above to go to the download site! When you get there you need to wait for it to come up on their site. When it gets done loading there will be a spot under the box that says Download. I hope this helps those new to this that have had trouble...if not let me know!